Single User Installation
Install Tally.ERP 9
Step 1: Double click on the Install.exe to execute the installer.

Step 2: Click the button “Next” to continue the Installation.

Step 3: In Tally.ERP 9 Setup screen, in the field that reads “application directory”, you can specify where you would like to have Tally.ERP 9 application files. By default, Tally will select C drive; if you want to change from C drive to D, you can do so. Once you specify the Tally.ERP 9 folder path, click “Next“.

Step 4: Click on “Install“.

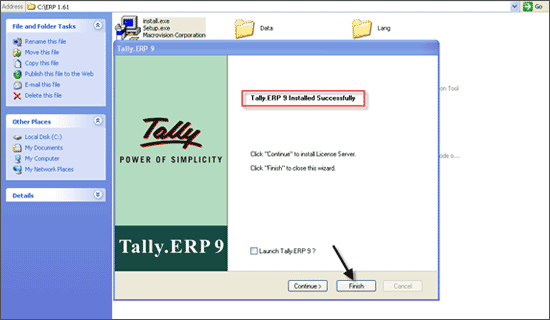
Step 5: You will get the message “Tally.ERP 9 Installed Successfully”. You can click on Finish to close the Wizard.

Activation of License
Step 1: Start Tally.ERP 9 -> Click on Activate License.


Step 2: Click on Activation of Promotional rental license.

Step 3: Enter the promotional code provided to you as in the screen and then enter your email ID and press ENTER.
Step 4: You will get the below screen and then press ENTER.

Step 5: Click on Unlock license.


Step 6: Check your mailbox you will receive the Unlock key.
Type or copy and paste (Ctrl+Alt+V) the Unlock Key and then press ENTER, and get started with Tally.ERP 9.
Press Enter button and you will get the message “Congratulation, Tally.ERP 9 Activated Successfully“.
Multi User Installation
Installing Tally.ERP 9 on the Server

Step 1: Double click on the Install.exe to execute the installer.
Step 2: Click the button “Next” to continue the Installation.

Step 3: In Tally.ERP 9 Setup screen, in the field that reads “application directory”, you can specify where you would like to have Tally.ERP 9 application files. By default, Tally will select C drive; if you want to change from C drive to D, you can do so. Once you specify the Tally.ERP 9 folder path, click “Next“.

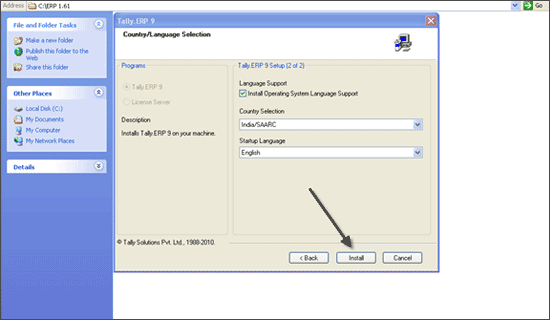
Step 4: Click on “Install“.
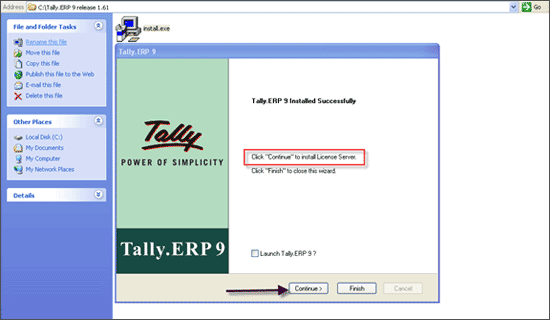
Step 5: You will get the message “Tally.ERP 9 Installed Successfully”. Click the button “Continue” to install “license Server”.
Note: License Server is used for ensuring that workstations connected in the network are able to work on Tally.ERP 9.
Step 6: For installing License server ensure that “License Server” radio button is selected and click the button “Next” and Install.
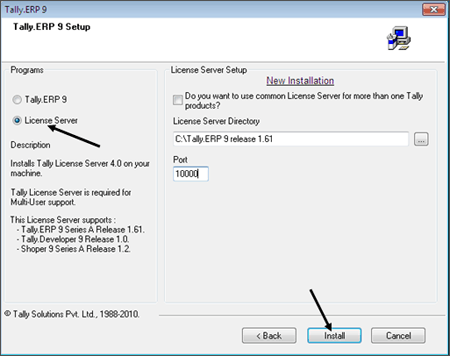
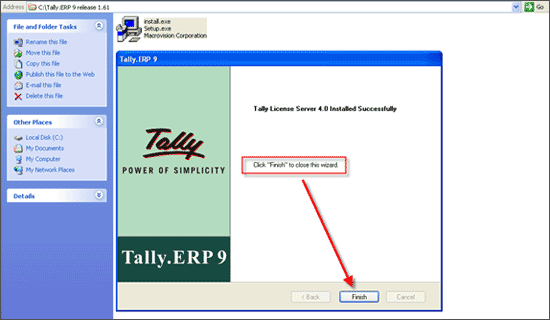
You will get the message, Tally License server 4.0 Installed successfully. You can click on Finish to close the Wizard.
Activation of License
Step 1:Start Tally.ERP 9 -> Click on Activate License.
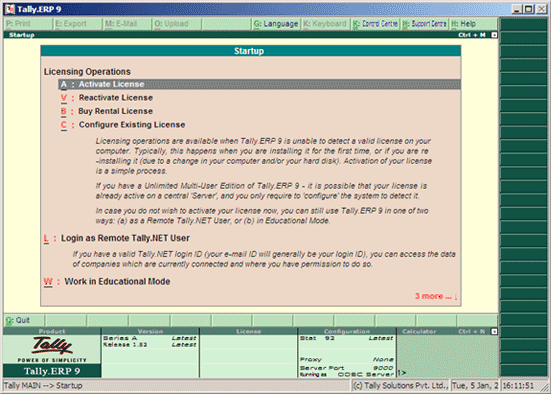
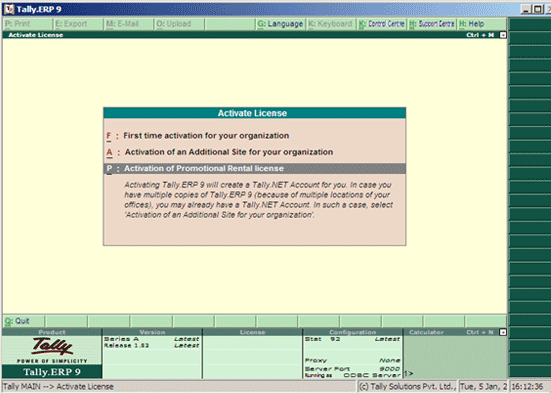
Step 2: Click on Activation of Promotional rental license.
Click on activation in single user mode if you are deploying this on a desktop. If you want to deploy a multi-user, please select “Option (1) Install and Start License Server in this system”.
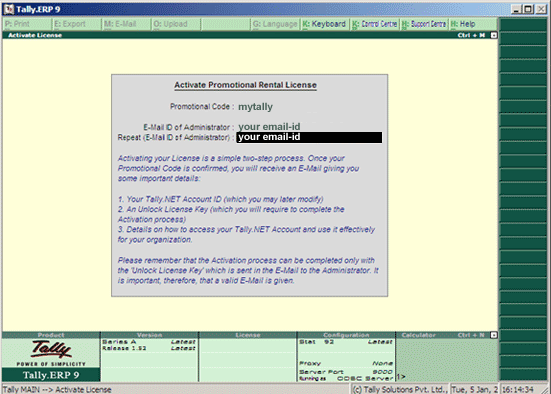
Step 3: Enter the promotional code provided to you as in the screen below and then enter your email ID and press ENTER.
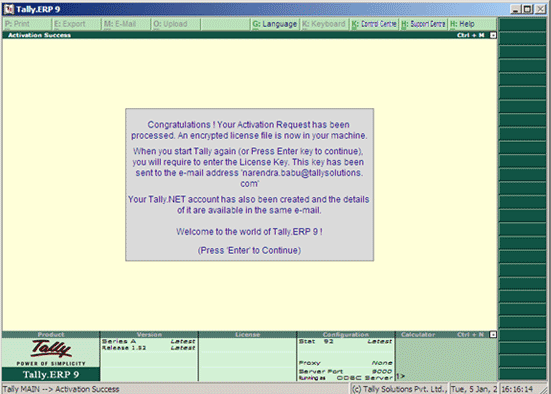
Step 4: You will get the below screen and then press ENTER.
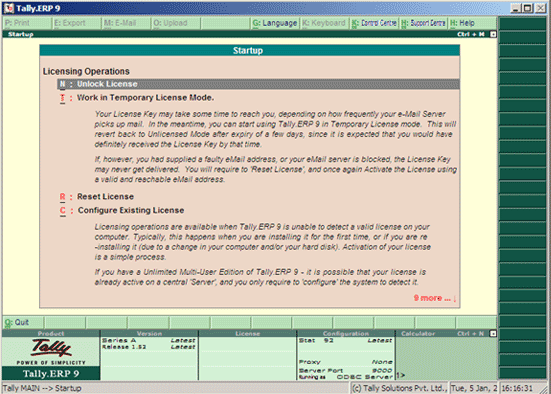
Step 5: Click on Unlock license.
Step 6: Check your mailbox you will receive the Unlock key.
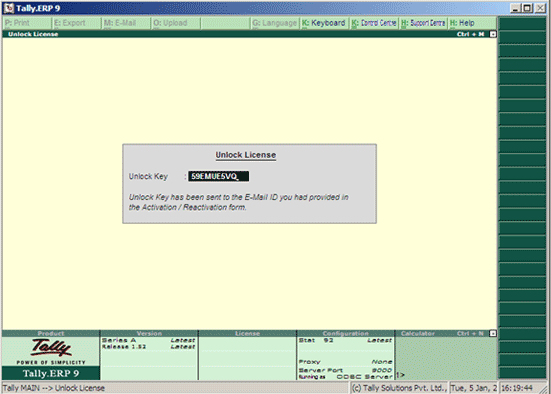
Type or copy and paste (Ctrl+Alt+V) the Unlock Key and then press ENTER, and get started with Tally.ERP 9.
Press Enter button and you will get the message “Congratulation, Tally.ERP 9 Activated Successfully“.
Configuring the workstations to work on Tally.ERP 9
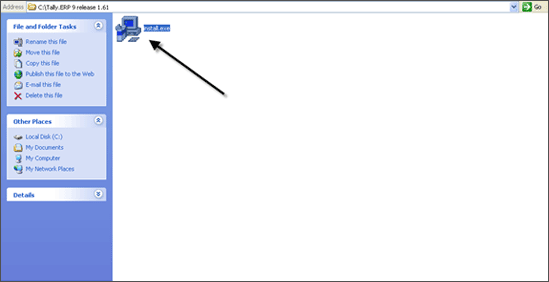
Step 1: One can either copy the downloaded Tally.ERP 9 installer (Setup.exe) or map the folder on the server where the Setup.exe is located.
Double click on the Install.exe to execute the installer file.
Step 2: Click “Next” to continue the Installation.
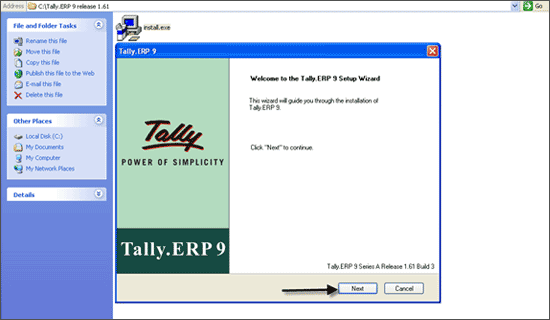
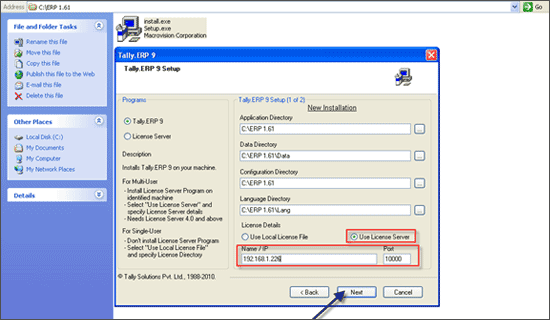
Step 3: Click on the radio button on the label that reads as “Use License Server”. Here you need to specify your Server name or server IP address and click on “Next”.
Note: By default Port number will be 9999. You have the flexibility of changing the port number from 9999 to 65000.
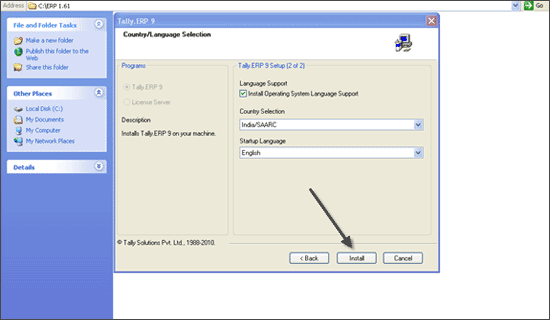
Step 4: Click on “Install“.
Step 5: Click on Finish. Now you are all set to start using Tally.ERP 9. Repeat the same step on other workstations from which you would like to use Tally.ERP 9.
