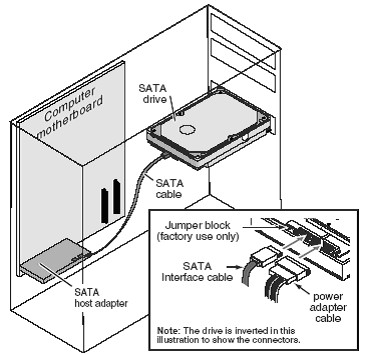
Steps to install hard disk are –
- Ground self against static electricity.
- Power down PC and remove power cable and then open the chassis cover.
- Locate place to for new drive by removing cover from drive bay
- Adjust the jumpers on the back of the drive according to the user guide. The default setting for most drives is set to ‘Master’ but if it is to be additional drive, set the jumpers to ‘Slave’.
- Slide drive into the drive bay.
- Secure the drive using mounting screws in either the side-mounting or bottom-mounting holes.
- Connect interface cable to the back of drive.
- Align the red edge with Pin 1 on the drive, located on side by power cable.
- The connector has an alignment notch to ensure it is inserted the right way.
- Attach other end of drive interface cable to connector on motherboard but key them to ensure correct orientation.
- Close chassis and restart PC. PC may automatically detect the new drive else, in BIOS setup instructs to auto detect new drive. Save the settings and exit the setup program. When PC restarts, it should recognize new drive.


