HTML5 Canvas Element
The <canvas> element was added to the official W3C HTML5 spec, becoming one of the most interesting and exciting parts of HTML5. This element provides scripts with a resolution-dependent bitmap canvas, which can be used for rendering graphs, game graphics, or other visual images on the fly. The markup for the canvas element looks like this:
<canvas id=”myCanvas” width=”200″ height=”200″></canvas>
The canvas element has a width and height set in the markup to give it an actual size and it requires scripting either by JavaScript or a JavaScript web development library like jQuery, for its full capabilities, an id attribute is needed. that will allow us to target it.
Basic Scripting – The element is targeted by using the Document Object Model (DOM). As more than one canvas element can be used on any given page, thus an ID attribute is needed.
After the canvas is targeted, the getContext JavaScript method is called to identify the context of the targeted canvas element. An example of code that draws an object on the canvas:
var canvas = document.getElementById(“myCanvas”);
var context = canvas.getContext(“2d”);
context.fillStyle = “rgba(0, 0, 255, .5)”;
context.fillRect(25, 25, 125, 125);
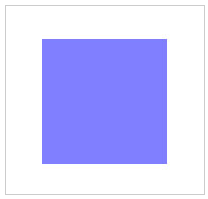
After defining the canvas element via the DOM (line 1), the context is defined (line 2), then a shape is drawn and colored (lines 3 and 4). The third and fourth lines consist of a few examples of custom code using the properties and methods available in the drawing API. The four values given above in the fillRect() method represent the distance from the x axis, the distance from the y axis, the width, and the height (in that order). The output of the above code is a box like this:

Important points about the canvas element are:
- Every canvas element starts out blank, so it will not appear on the page until something is drawn on it or if it’s styled via CSS.
- Each canvas element appears in the DOM
- Any item can be erased that is drawn on the canvas by resetting the width and/or height of the canvas element
- The getContext() method “returns an object that exposes an API for drawing”
- There are currently two kinds of contexts available: 2d and webgl but 2d is widely used context.
- The canvas element is “resolution-dependent”
- The default color for any shape drawn is black
- Canvas-drawn objects are given colors using RGBA or Hex values
Drawing Rectangles and Paths – The 2D context allows for the use of a number of different drawing methods and properties. Some of the JavaScript methods associated with drawing rectangles are:
- fillStyle(color|pattern|gradient): Sets a fill style for the shape
- fillRect(x,y,w,h): Draws a rectangle as per given size and coordinate values
- clearRect(x,y,w,h): Clears the pixels in the space defined by given size and coordinate values
- strokeStyle(color|pattern|gradient): Sets a stroke style for the shape
- strokeRect(x,y,w,h): Draws the rectangle using strokes or borders
Straight lines can be drawn using the moveTo() and lineTo() methods. These methods define, by means of x and y coordinates, the start and end points of the lines, or paths, that will be drawn. These methods, do not draw the visible lines but, they prepare the canvas for the actual stroking of the lines that will occur when the stroke() method is called. As illustrated by a example as
var canvas = document.getElementById(“myCanvas”);
var context = canvas.getContext(“2d”);
context.moveTo(0, 0);
context.lineTo(400, 400);
context.strokeStyle = “#ff0000”;
context.stroke();
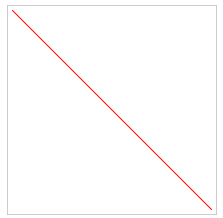
Assuming the markup remains the same (with the canvas sized at 400×400), the code above (lines 3-6) draws a diagonal line from the top left corner of the canvas (0, 0) to the bottom right corner (400, 400). The last line of code uses the aforementioned stroke() method to stroke the path that was prepared on lines 3 and 4. Line 5 has the optional strokeStyle method that can give the line a color, gradient, or pattern. If a stroke style is not declared, the line will be black by default.
This is the line that is drawn by the code block above:

Here are some further points to note about the drawing API:
- Coordinates that define paths and shapes can have decimal values
- To draw multiple paths in multiple stroke styles, use the beginPath() method for each line, then the closePath() method to end the path after it’s drawn
- Any Unicode character can be drawn onto a canvas element by using the font, testAlign, and textBaseline attributes to style and align the characters
Linear and Radial Gradients – The canvas drawing API allows to fill shapes and paths with two types of gradients. Here is an example showing a rectangle being filled with a linear gradient:
var canvas = document.getElementById(“myCanvas”);
var context = canvas.getContext(“2d”);
var myGradient = context.createLinearGradient(0, 0, 100, 0);
myGradient.addColorStop(0, “#cccccc”);
myGradient.addColorStop(1, “#ffffff”);
context.fillStyle = myGradient;
context.fillRect(25, 25, 125, 125);
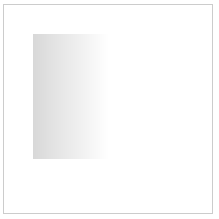
On line 3 above, the gradient is stored in memory and is given 4 arguments. The first two arguments are the x and y coordinates that determine the starting point of the gradient; the second two arguments are the x and y coordinates that determine the end point of the gradient. After the gradient is created (but not drawn yet), color stops are added (lines 4-5). Then the fill style is defined on the canvas context, and the gradient that is created on line 3 is added as the value of the fill (line 5). After line 5, everything is just stored in memory, waiting to be used on a shape or path. The last line makes the gradient visible by creating a shape on which to place the gradient.
This is what the gradient looks like:

Important notes on gradients:
- The position of the gradient is relative to the canvas, not the shape
- The first and last color stops in a linear gradient are represented by 0 and 1
- Radial gradients are created using the createRadialGradients() method
Other Methods and Properties Available – Canvas has a much broader set of tools available in its drawing API as
- Transformations, including scale and rotate
- Compositing
- Shadows
- Complex shapes, including Bezier curves and arcs
Fallback Content – It’s strongly recommended that fallback content be used for non-supporting devices. Fallback content is included by putting them between the opening and closing <canvas> tags as
<canvas id=”myCanvas” width=”400″ height=”400″>
<img src=”images/fallback.jpg” alt=”Fallback Content” width=”400″ height=”400″ />
</canvas>
If canvas is unavailable, the user will see the fallback.jpg image instead. That image will not display if canvas is supported.
Browser and Mobile Device Support – The extent of browser support for the canvas element and its associated scripting is Internet Explorer 9, Firefox 3.0+, Safari 3.0+, Chrome 3.0+, Opera 10.0+, iPhone 1.0+ and Android 1.0+
Apply for HTML5 Certification Now!!
http://www.vskills.in/certification/Certified-HTML5-Developer

