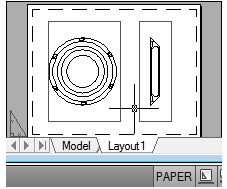
Layout tabs access an area called paper space. In paper space, you place your title block, create layout viewports to display views, dimension your drawing, and add notes. In paper space, one unit represents the paper distance on a plotted sheet. The units will be in either millimeters or inches, depending on the plot setup for your plotter.
On a layout tab, you can view and edit paper space objects, such as layout viewports and title blocks. You can also move an object (such as a leader or a title block) from model space to paper space (or vice versa). The crosshairs cursor is active over the entire layout area.

These tabs can be hidden, appearing instead as buttons on the status bar at the bottom-center of the application window. To display the tabs, right-click the Model or layout button and click Display Layout and Model Tabs on the shortcut menu.
Create Additional Layout Tabs – By default, a new drawing starts with two layout tabs, named Layout1 and Layout2. If you use a drawing template or open an existing drawing, the layout tabs in your drawing may be named differently. You can create a new layout tab using one of the following methods:
- Add a new layout tab with no settings and then specify the settings in the Page Setup Manager.
- Use the Create Layout wizard to create the layout tab and specify settings.
- Copy a layout tab and its settings from the current drawing file.
- Import a layout tab from an existing drawing template (DWT) file or drawing (DWG) file.
You can create multiple layouts in a drawing; each layout can contain different plot settings and paper sizes. However, to avoid confusion when transmitting and publishing drawings, it is usually recommended that you create only one layout for each drawing. Alternatively, you can right-click the existing layout tab and click New layout. To rename a layout, double-click the layout tab.
The Layout Wizard – You can create a new layout using the Create Layout wizard. The wizard prompts you for information about the layout settings, including
- A name for the new layout
- The printer associated with the layout
- A paper size to use for the layout
- The orientation of the drawing on the paper
- A title block
- Viewport setup information
- A location for the viewport configuration in the layout
You can edit the information entered in the wizard later. Click Output tab Plot panel Page Setup Manager.
To duplicate a layout – Alternatively, you can press CTRL+drag to create a duplicate copy of the selected layout or a group of selected layouts.
To rename a layout – Alternatively, you can double-click the layout tab for the layout you want to rename and directly enter the new name for the layout. The Model tab cannot be renamed.
To delete a layout – The Model tab cannot be deleted.
Create and Modify Objects in a Layout Viewport – If you plan to create or modify objects, use the button on the status bar to maximize the layout viewport. The maximized layout viewport expands to fill the drawing area. The center point and the layer visibility settings of the viewport are retained, and the surrounding objects are displayed.
You can pan and zoom while you are working in model space, but when you restore the viewport to return to paper space, the position and scale of the objects in the layout viewport are restored. If you use PLOT while a viewport is maximized, the layout tab is restored before the Plot dialog box is displayed. If you save and close the drawing while a viewport is maximized, the drawing opens with the layout tab restored.
If you choose to switch to the Model tab to make changes, the layer visibility settings are the settings for the drawing as a whole, not the settings for that particular layout viewport. Also, the view is not centered or magnified the same way it is in the layout viewport.
Adjust the View in a Layout Viewport – If you plan to pan the view and change the visibility of layers, double-click within a layout viewport to access model space. The viewport border becomes thicker, and the crosshairs cursor is visible in the current viewport only. All active viewports in the layout remain visible while you work. You can freeze and thaw layers in the current viewport in the Layer Properties Manager, and you can pan the view. To return to paper space, double-click an empty area on the layout outside a viewport. The changes you made are displayed in the viewport.
If you set the scale in the layout viewport before you access model space, you can lock the scale to prevent changes. When the scale is locked, you cannot use ZOOM while you work in model space.

Export a Layout to Model Space – You can export all visible objects from the current layout to model space. You can export all visible objects from the current layout to the model space with the EXPORTLAYOUT command. Objects that are outside the boundaries of “paper” in the layout are also exported. Some objects are not exported to the model space drawing. The objects are
- Materials
- Cameras
- Lights
- Named views
- Objects on layers that are disabled (off) or frozen
- Model space objects not visible in a given viewport

