Installing Routers and Router Interfaces
Steps for installing an card are -
Step 1 Install a slot divider in the center of the slot to create two single-wide interface card slots. (For interface card slots that contained double-wide interface cards.)
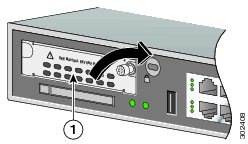
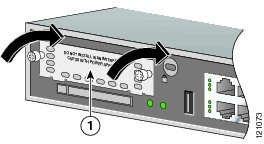
Step 2 Align the captive screws with the threaded holes on the chassis. Using either a number 1 Phillips screwdriver or a small flat-blade screwdriver, tighten the captive screw(s) until the blank faceplate is flush with the chassis. (See Figure 1. and Figure 2)
Figure 1 Installing a Single Thumb Screw Interface Faceplate

|
1
|
A Blank Interface Faceplate with Single Thumb Screw. |
Figure 2 Installing a Double Thumb Screw Interface Faceplate

|
1
|
A Blank Interface Faceplate with Double Thumb Screw. |
Step 3 Repeat Step 1 and Step 2 for every empty interface card slot.
Step 4 Continue with hardware installation tasks.
Removing Blank Faceplates
To remove blank faceplates, perform the following steps:
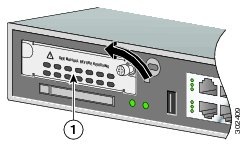
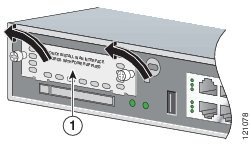
Step 1 Using either a number 1 Phillips screwdriver or a small flat-blade screwdriver, unscrew the captive screws and remove the blank faceplate from the chassis slot you plan to use. (See Figure 3 and Figure 4.)
Figure 3 Removing a Single Thumb Screw Blank Interface Faceplate

|
1
|
A Blank Interface Faceplate with Single Thumb Screw. |
Figure 4 Removing a Double Thumb Screw Blank Interface Faceplate

|
1
|
A Blank Interface Faceplate with Double Thumb Screw. |
Steps to install a router
The following steps have to be done:
- Connect Admin-Workstation with a serial cable to the firewall for the configuration
- Install TFTP-Server and Terminalemulation Software on Admin-Workstation
- Save current CISCO IOS from Router to the Admin-Workstation
- Download CISCO Firewall IOS to the Router using TFTP
- Save current Configurationfile from Router to the Admin-Workstation using TFTP
- Create Configurationfile and download it to the Router using TFTP

