Apply Workbook Security Settings
Click the Protect Workbook command button in the Changes group on the Review tab.
Excel opens the Protect Structure and Windows dialog box, where the Structure check box is selected by default. With the Structure check box selected, Excel won’t let anyone mess around with the sheets in the workbook (by deleting them or rearranging them).
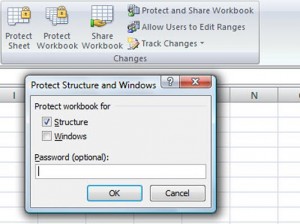
- (Optional) If you want to protect any windows that you set up, select the Windows check box.When selected, this setting keeps the workbook windows in the same size and position each time you open the workbook.
- To assign a password that must be supplied before you can remove the protection from the worksheet, type the password in the Password (optional) text box.
- Click OK.If you typed a password in the Password (optional) text box, Excel opens the Confirm Password dialog box. Re-enter the password in the Reenter Password to Proceed text box exactly as you typed it Step 3, and then click OK.
Unprotecting a workbook
To remove protection from the current workbook, follow these steps:
- Click the Unprotect Workbook command button in the Changes group on the Review tab.
- If you assigned a password when protecting the workbook, type the password in the Password text box and click OK.
Protecting a shared workbook
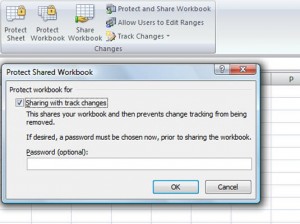
If you create a workbook with contents to be updated by several different users on your network, you can use the Protect and Share Workbook command to ensure that Excel tracks all the changes made and that no user can intentionally or inadvertently remove Excel’s tracking of changes. Follow these steps:
- Click the Protect and Share Workbook command button in the Changes group on the Review tab.The Protect Shared Workbook dialog box appears.
- Select the Sharing with Track Changes check box.
Apply for MS Excel Certification Now!!
https://www.vskills.in/certification/excel-online-certification-course
